
Algorithm and Data Structure - Interface
Professor Zhou Ligong's years of hard work on the books "Programming and Data Structure" and "Programming for AMetal Framework and Interface (I)" sparked a learning trend in the electronics industry after their publication. Authorized by Professor Zhou, this public account has serialized the content of "Programming and Data Structure," and is now willing to share it with you.
This article covers Chapter 3, Section 3.2.3 — Interfaces.
> > > **3.2.3 Interface**
In real-world applications, simply adding interface functions to the end of a linked list and traversing it isn't always sufficient. For example, when adding a node, it's common to append it to the end of the list, so that the newly added node comes after the first one. When writing such a function, the process involves modifying the `p_next` value of the last node in the original list from `NULL` to point to the new node.
Although the operation seems simple, it requires finding the tail node before adding a new node. This means starting from the `p_head` pointer and traversing each node until reaching the one where `p_next` is `NULL`. As you can imagine, this reduces efficiency as the list grows longer. If the list is very long, the performance becomes significantly worse because the list must be traversed every time a node is added.
To improve efficiency, why not change the approach and add nodes to the head of the list instead? Since there is a `p_head` pointer pointing to the head node, we don’t need to search for it, which greatly improves performance. When inserting a node at the head of the list, the changes are illustrated in Figure 3.11.
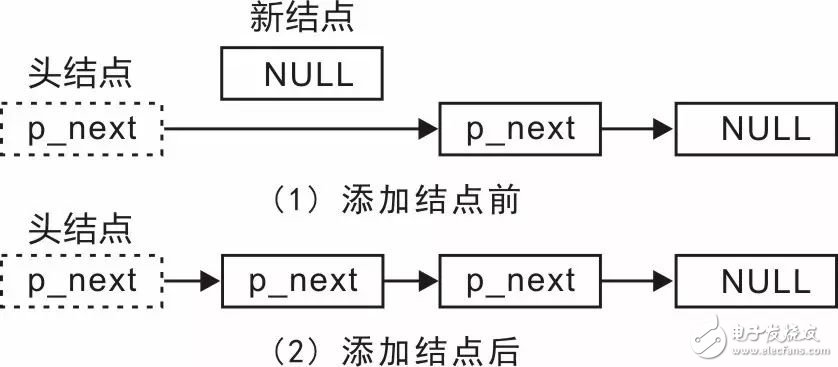
During implementation, two pointers need to be modified: (1) set the `p_next` of the new node to point to the node currently pointed to by the head node’s `p_next`, and (2) update the head node’s `p_next` to point to the new node.
Compared to adding a node at the tail, this method eliminates the need to traverse the list to find the tail. No matter how long the list is, the insertion can be completed in just two steps. The function prototype for inserting a node at the head of the list (in `slist.h`) is shown below:

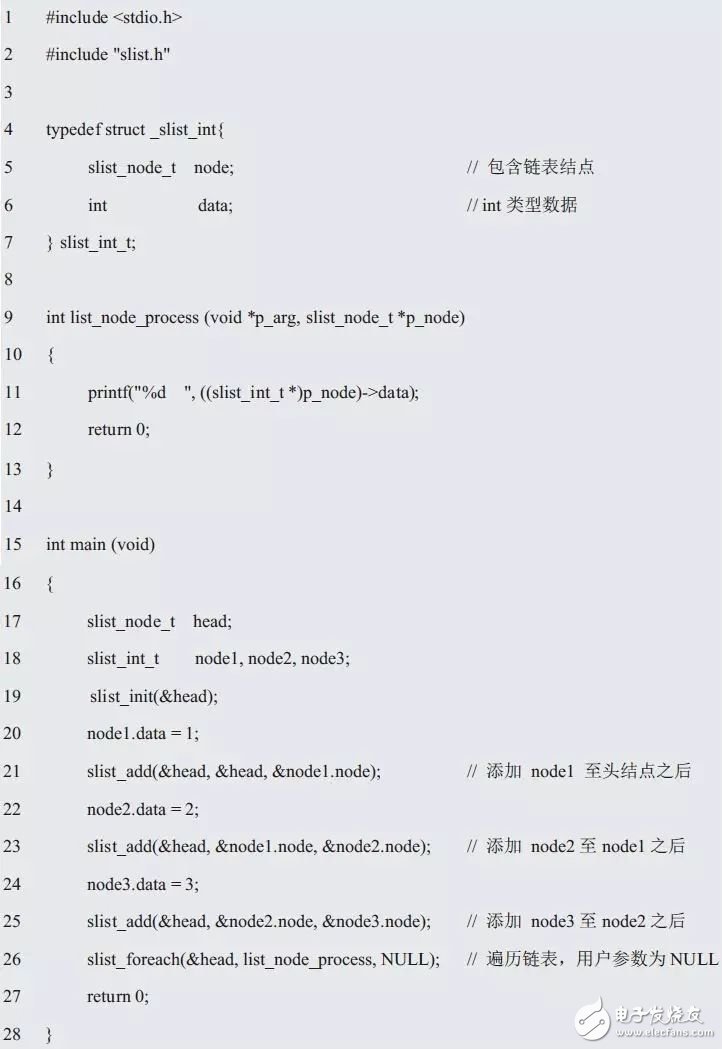
Here, `p_head` points to the head node, and `p_node` is the node to be inserted. The implementation is detailed in Listing 3.21.

As you can see, inserting a node at the head is simple and efficient, so in practice, if there's no specific requirement for the position, it's preferable to insert nodes at the head of the list.
To test this, modify line 26 of Listing 3.20, for example:

Insert `node3` at the head and observe what happens to the final output.
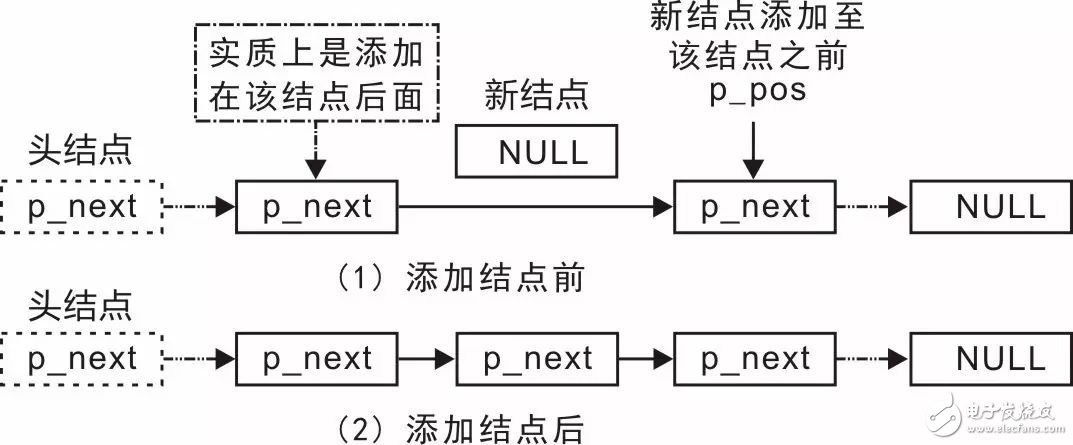
Since it's possible to add nodes at both the head and tail, why not make it more flexible by providing an interface function that allows inserting a node at any position? When inserting a node after the one pointed to by `p_pos`, the linked list changes as shown in Figure 3.12.
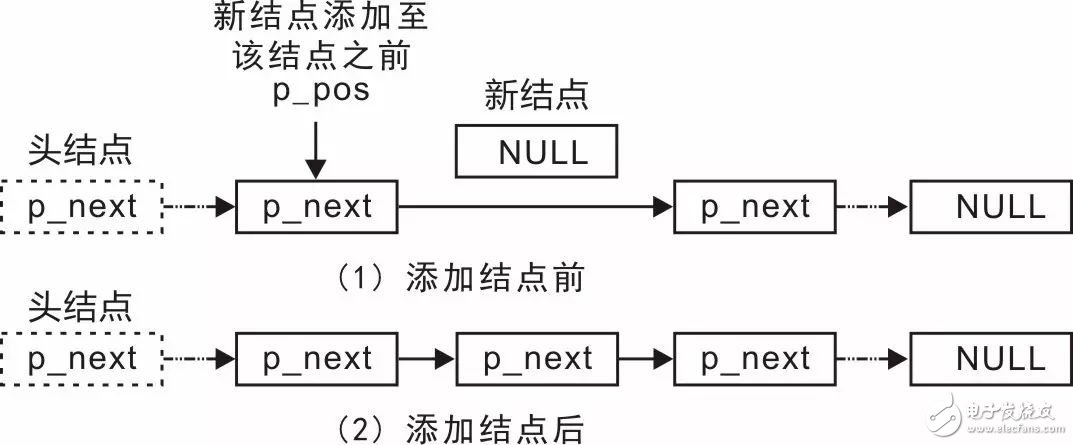
The implementation involves modifying two pointers: (1) set the `p_next` of the new node to point to the next node of the node pointed to by `p_pos`, and (2) update the `p_next` of the node pointed to by `p_pos` to point to the new node. This allows insertion in just two steps. The function prototype (in `slist.h`) for inserting a node at any position is as follows:

Here, `p_head` points to the head node, `p_node` is the node to be inserted, and `p_pos` indicates the location where the new node should be placed. For details, refer to Listing 3.22.
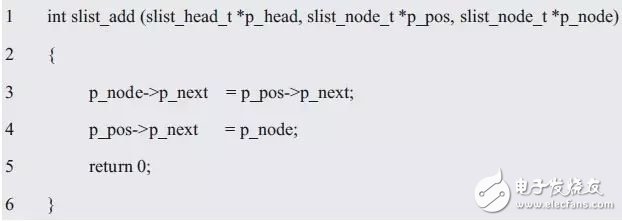
Although this function doesn't use the `p_head` parameter during its implementation, it is still passed in because `p_head` will be used in other functions, such as verifying whether `p_pos` exists in the list.
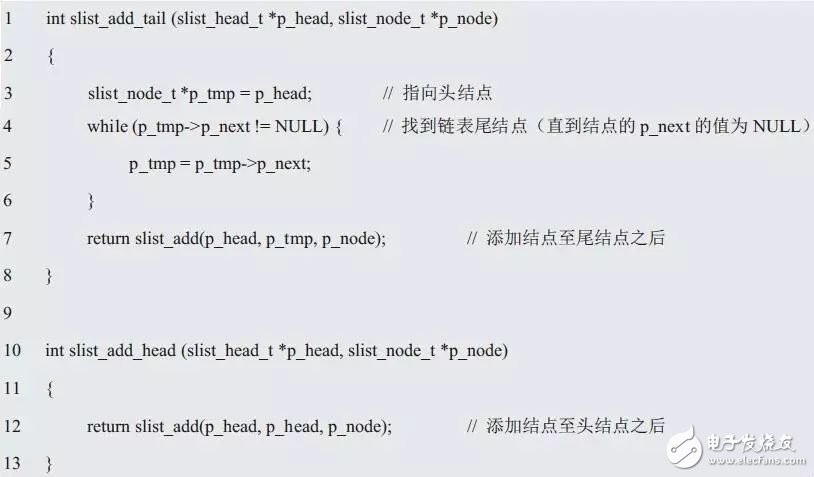
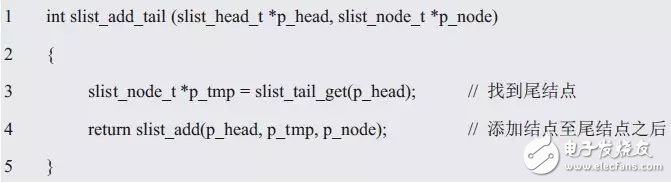
As discussed earlier, directly inserting a node at the end of the list is inefficient due to the need to traverse the list to find the tail. However, once the function to insert at any position is available, inserting a node at the end becomes straightforward. See Listing 3.23 for more details.
Clearly, inserting at the head or tail is just a special case of inserting at any position:
- Inserting at the head means inserting after the head node.
- Inserting at the tail means inserting after the last node.
The implementation of `slist_add_head()` and `slist_add_tail()` is detailed in Listing 3.24.
What if you want to insert a node before another node? In fact, this is just a variation of inserting after a node — you insert it after the previous node, as shown in Figure 3.13.
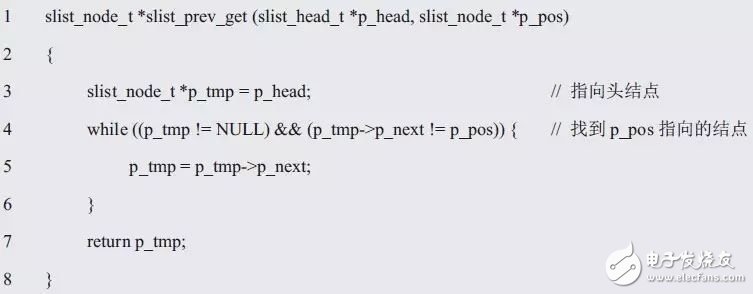
To do this, you need to get the predecessor of the target node and then use the `slist_add()` function to insert the new node before it. To achieve this, a function that finds the predecessor of a node is required. Its function prototype (in `slist.h`) is:

Here, `p_head` points to the head node, and `p_pos` is the node whose predecessor you want to find. Since a singly linked list does not have a pointer to the previous node, the only way is to start from the head and traverse the list until you find the node whose `p_next` points to `p_pos`.
The implementation of this function is detailed in Listing 3.25.
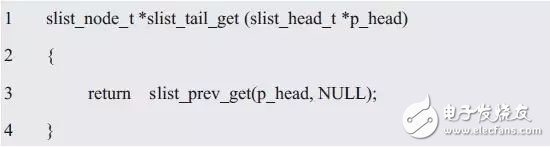
If `p_pos` is `NULL`, the function returns `NULL`, which represents the tail node. For user convenience, you can also wrap a function that directly finds the tail node. Its function prototype is:

The implementation is detailed in Listing 3.26.
Once the tail node is found, there's no need to manually search for it when inserting at the end. The updated `slist_add_tail()` function is shown in Listing 3.27.
Correspondingly, you can also delete a node from the linked list. Suppose there are three nodes in the list and you want to delete the middle one. The changes in the linked list before and after deletion are shown in Figure 3.14.
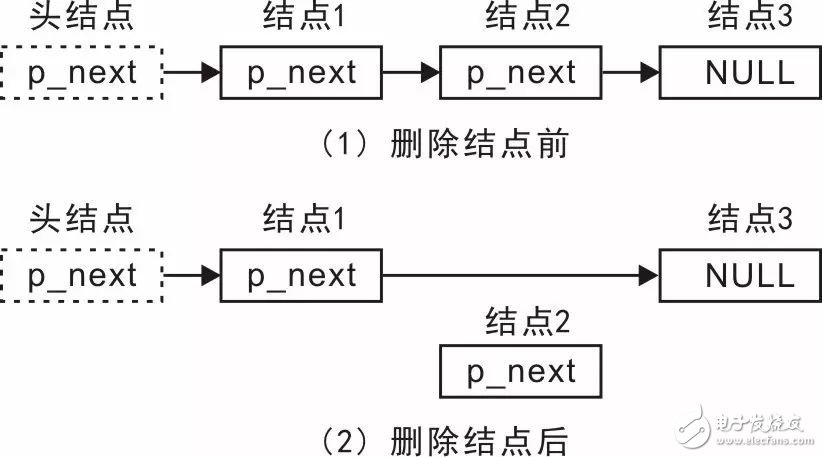
Clearly, deleting a node also involves modifying two pointers: update the `p_next` of the previous node to point to the next node of the deleted node, and set the `p_next` of the deleted node to `NULL`.
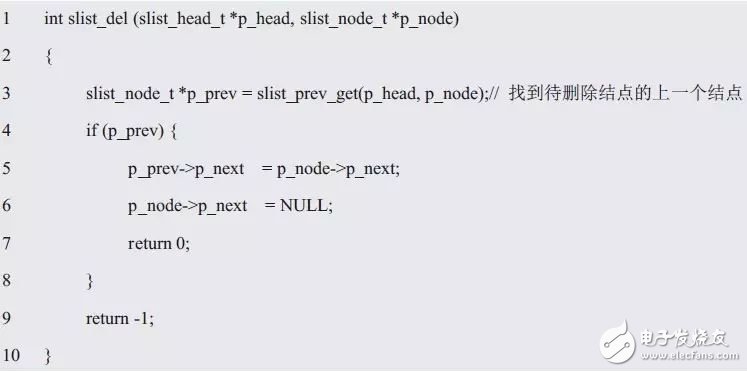
The function prototype (in `slist.h`) for deleting a node is:

Here, `p_head` points to the head node, and `p_node` is the node to be deleted. The implementation of `slist_del()` is detailed in Listing 3.28.
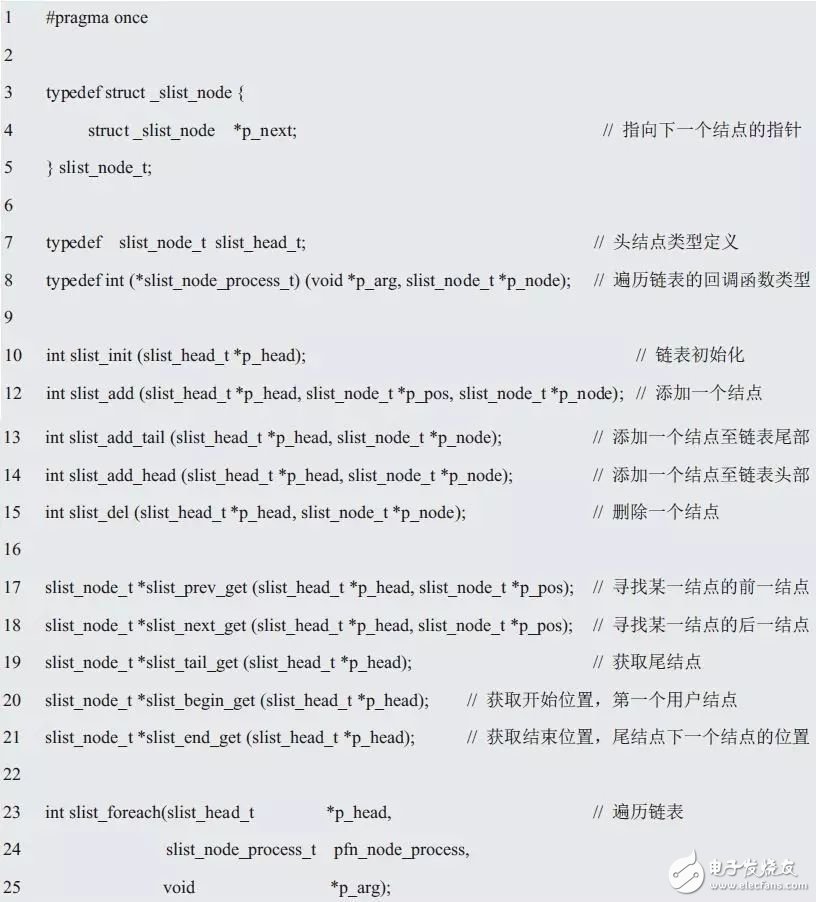
For reference, the contents of the `slist.h` file are shown in Listing 3.29.
The integrated sample program is detailed in Listing 3.30.
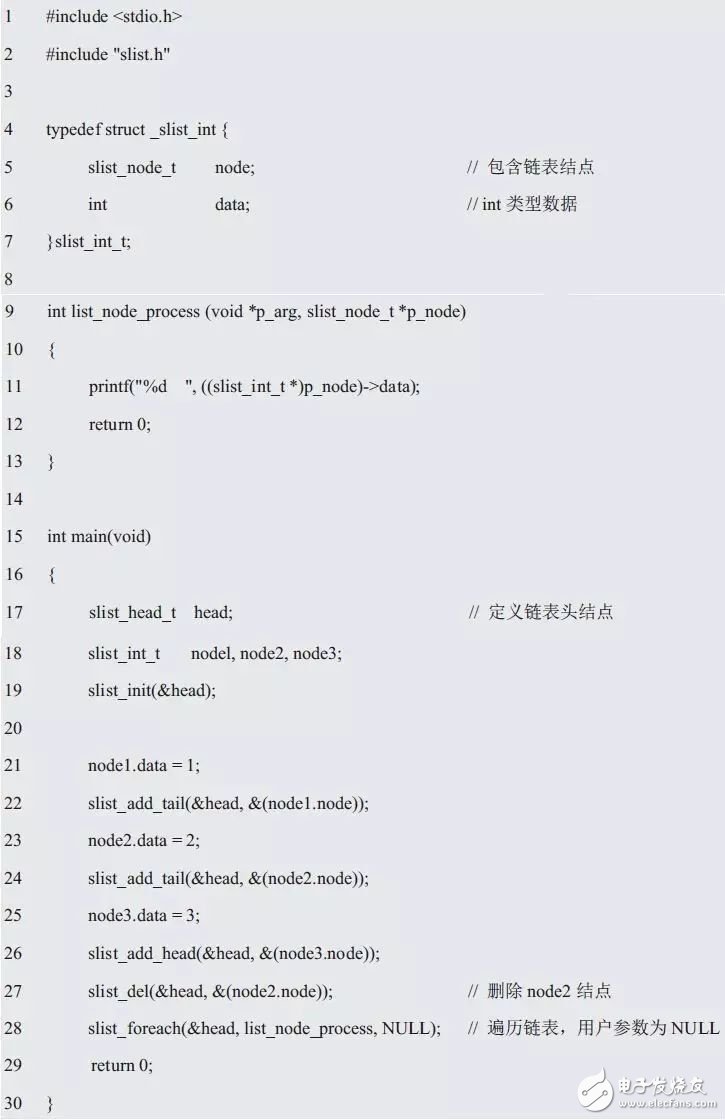
All nodes in the program are defined using static memory allocation, meaning the memory for each node is allocated before the program runs. However, dynamic memory allocation would require using functions like `malloc()` at runtime.
Static memory allocation avoids memory leaks and ensures that all node memory is already allocated at compile time, without the need to spend time on memory allocation or handle allocation failures. Therefore, it's commonly used in embedded systems. However, a major drawback is that it cannot release memory. Sometimes users may want to free the memory of deleted nodes, which requires dynamic memory allocation.
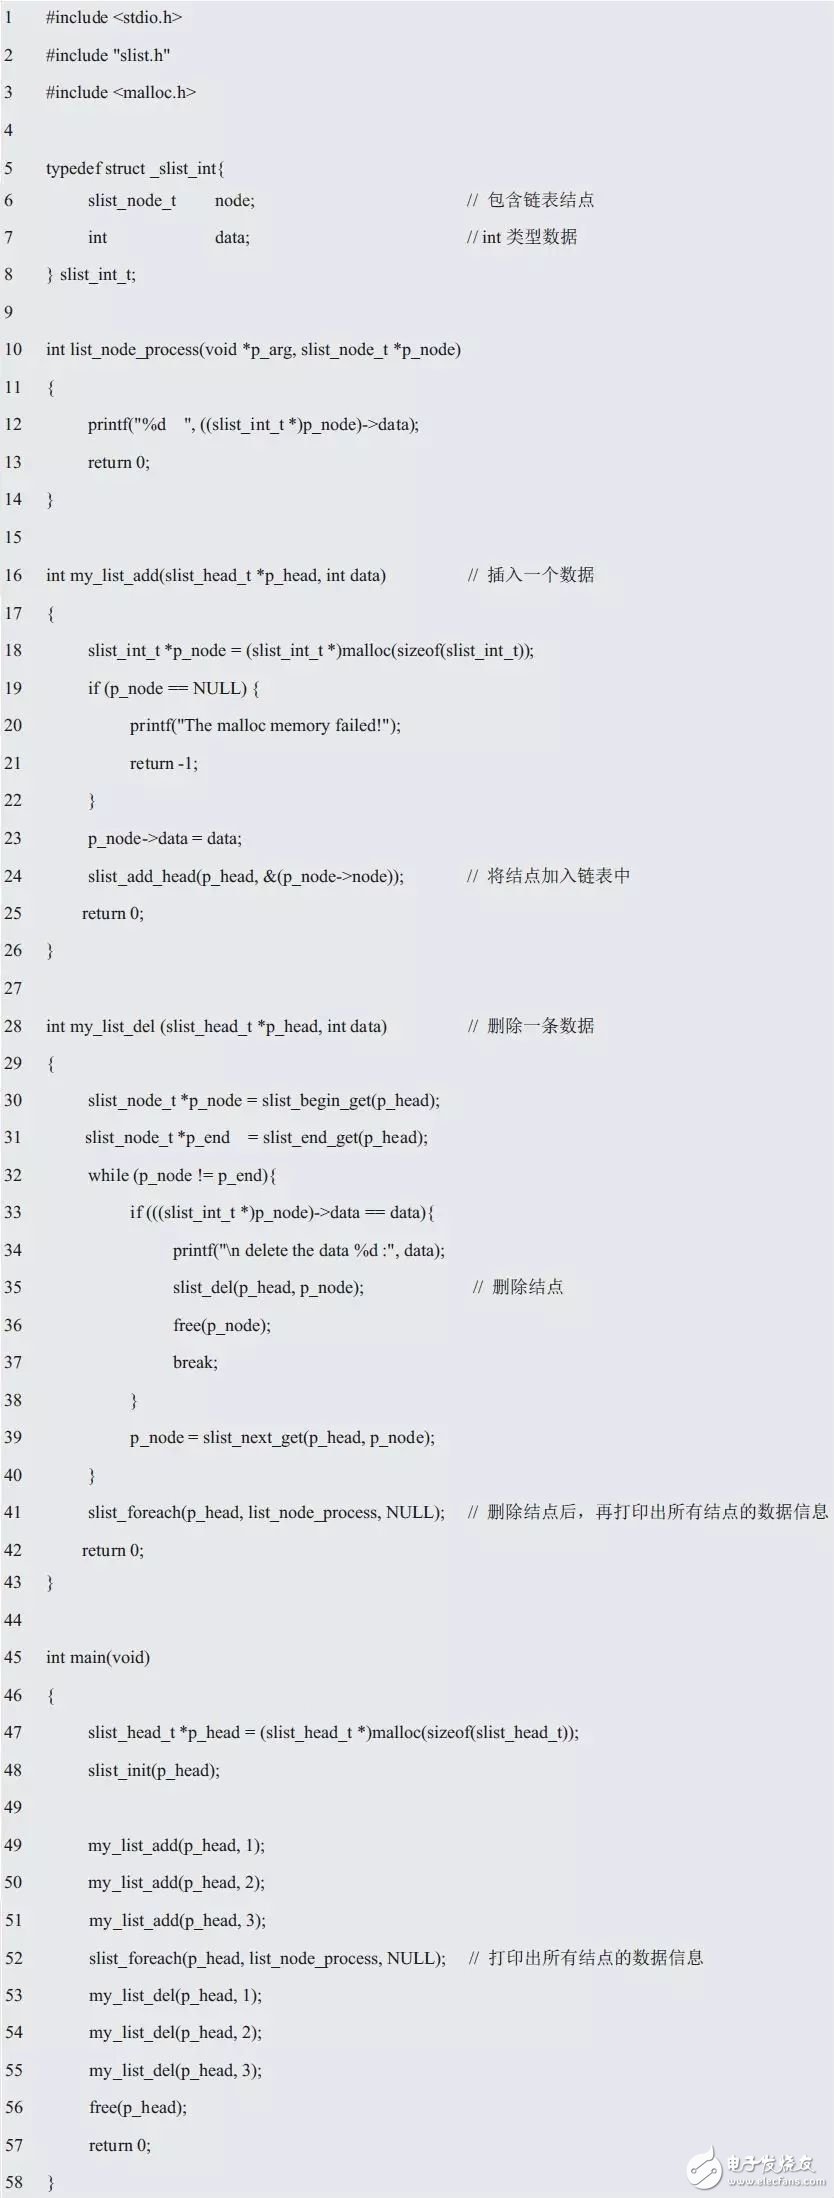
In fact, the core code of the linked list only handles the operations of the list itself. It only needs to pass the address of the node (`p_node`). The linked list program doesn't care about where the node's memory comes from. Based on this, achieving dynamic memory allocation simply requires using functions like `malloc()` in the application. See Listing 3.31 for details.
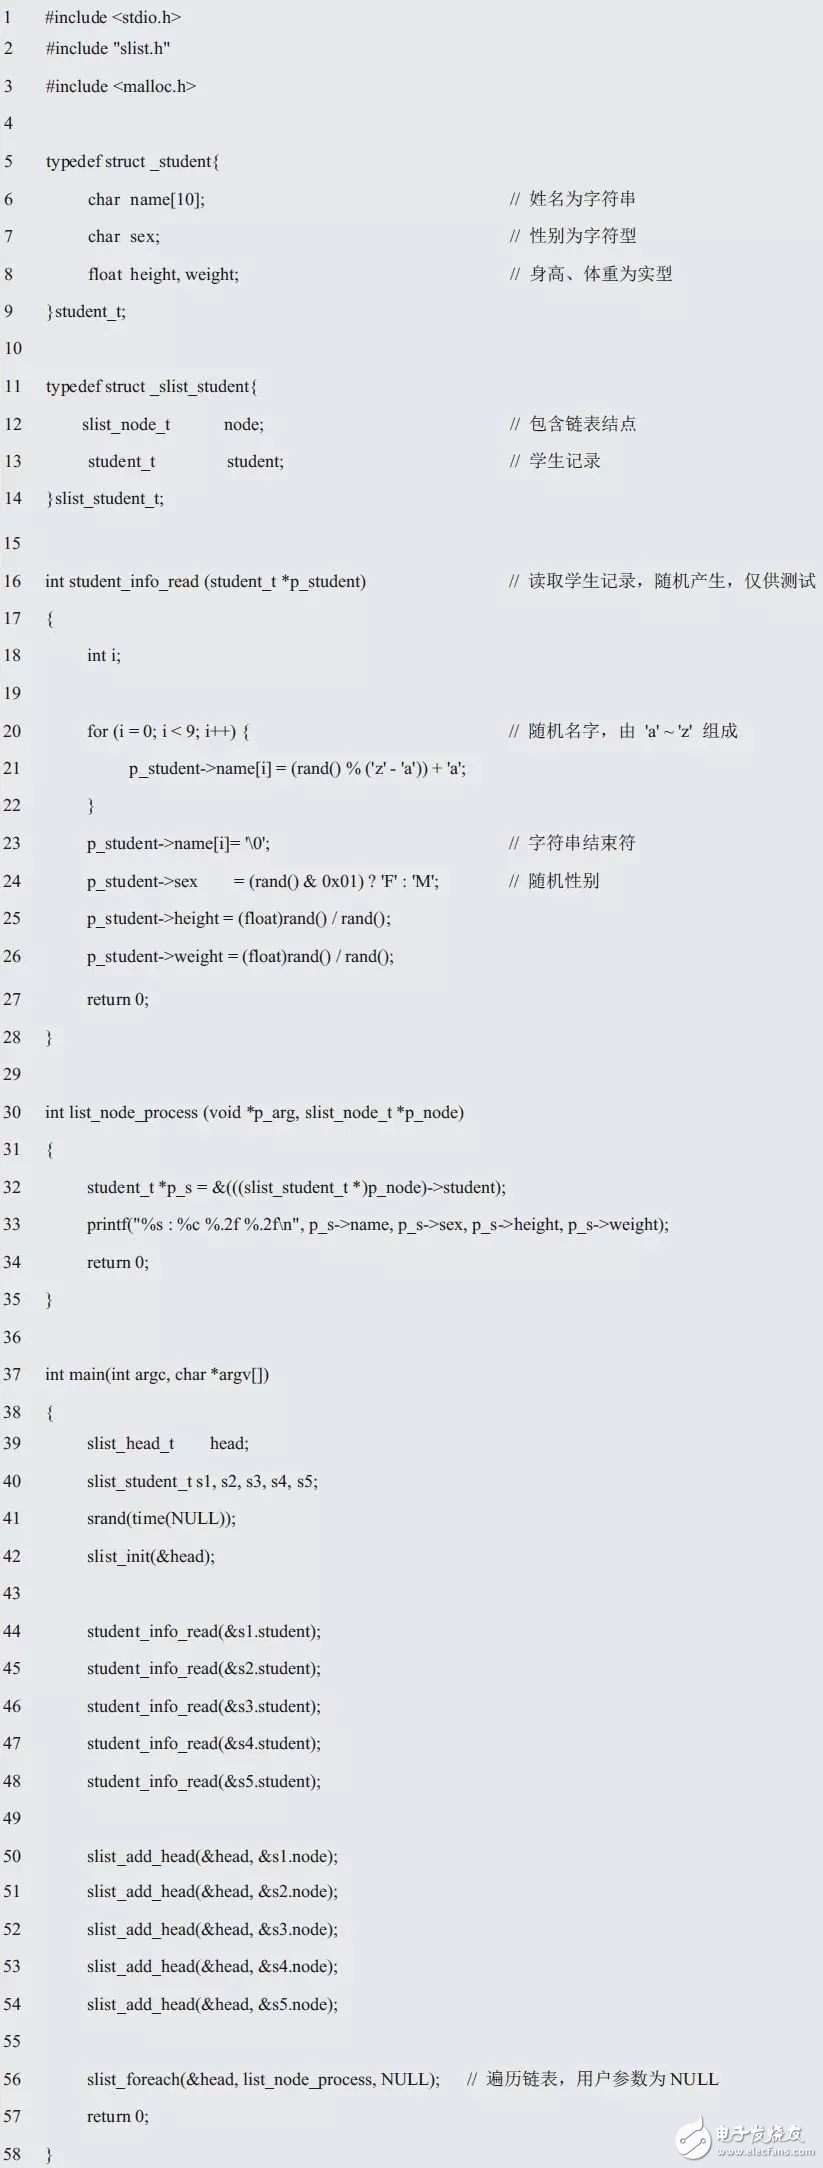
If you're using a linked list to manage student records, for example, you need to add a linked list node to the student record structure, such as:

Although this definition allows managing student information using a linked list, it introduces a serious issue: changing the student record type definition affects all modules that use it. In practical applications, student records can be managed in a linked list or an array. When using arrays, the record structure must be reworked. A node is only part of the linked list and has nothing to do with the student record. You can't embed nodes directly in the student record structure; they should be separated. Based on this, a new struct type needs to be defined to associate the student record with the node so that the student record can be managed through a linked list, such as:

See Appendix 3.32 for usage examples.
In summary, although the linked list is more flexible than an array and makes inserting and deleting nodes easier, it loses the “random access†capability of the array. If the node is near the beginning of the list, accessing it is fast, but if it's near the end, it's slow. Additionally, the singly linked list lacks the ability to backtrack. When inserting a node, you must know the previous node, and when deleting, you must also know the previous node. Reversing the list is also difficult. A doubly linked list can solve these issues.
1.25mm Wire To Board Connector
1.25mm Wire To Board Connector
Dongguan City Yuanyue Electronics Co.Ltd , https://www.yyeconn.com