
Construction details of the open source "voice change" module
Wave Shield for the Arduino platform was an early mask set from Adafruit, and it has always been so popular. We have enough reasons to believe that this is the easiest and most convenient way to add high-quality sound effects to Arduino.
Like a bottle of good wine, open source projects have improved over time. We are told that this mask has a new trick: that is a real-time voice changer. The pronunciation is like the baritone singer Sith Lord, which everyone loves, or like the follow-up of Lollipop Guild. Wave Shield became a popular Halloween project early in the morning. The latest additions are also closely related to this theme.
List of core parts
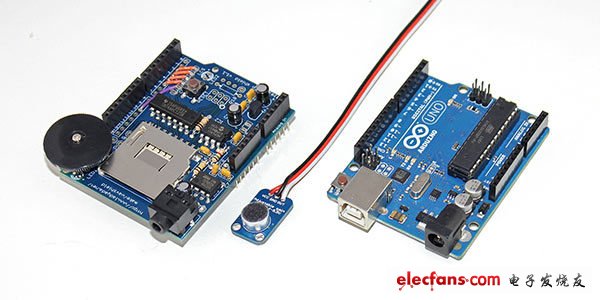
There are three and new components in this project:
Arduino Uno (Older versions of Arduino Duemilanove or 328 Diecimila are also suitable, but Arduino Mega or Leonardo are not compatible.)
Adafruit Wace Shield
Adafruit microphone amplifier connector
You also need basic welding tools, wires and bits & bobs
Other components
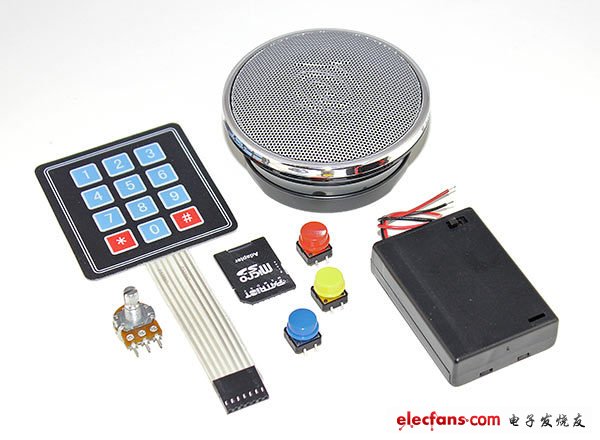
This is an extensible project, and what components are used to decide what purpose you intend to use it to achieve. Read through the whole process, paying attention to the opinions and suggestions in some details.
Because there is sound output, you need a headset, a portable MP3 speaker, or our classic Class D amplifier. The demo scan probably uses a 12-key keyboard to trigger the pre-recorded sound. If you just want to use sound effects. Your application only needs a few simple buttons, or nothing.
If you want to add some pre-recorded sounds, you need an SD card containing WAV files.
Use a 10K potentiometer to adjust the pitch. Or you can make a simple permanent setting.
If you want to fiddle with these wires, an additional prototype mask and stack head can be easily implemented. Weld the wave shield with the stack head while placing the prototype mask on it.
In order to make it as portable as clothing and props, batteries, battery sleeves, etc. must be added.
To reiterate, it is necessary to read the entire process carefully, because it can facilitate the purchase of the components you need in your project. We will show some examples. But these things are not up to date. But these are the essence of Arduino.
First emphasize the important things
We strongly suggest that it should be said that you are required to complete the original Wave Shield tutorial reading before starting this project. This is a good way to verify that key parts are working before adding additional levels of complexity.
Now analyze some annoying background theory knowledge. If you just want to do something, then you can skip the article.
Three anti-light means: waterproof, dustproof, anti-corrosion of the three anti. The use of special anti-oxidation anti-corrosion materials and silicone seals to achieve the protection requirements of lamps. This lamp on the circuit control board for anti-corrosion, waterproof, anti-oxidation treatment, for the electrical box sealed cooling characteristics of the weak, intelligent temperature control three anti-lamp dedicated working circuit, reducing the power inverter operating temperature, The double insulation of the connector ensures that the circuit is safe and reliable. According to the actual working environment of three anti-lights, the surface of the protective equipment for nano-spray moisture-proof anti-corrosion treatment, put an end to the dust and moisture into.
LED Tri-Proof Light,Tube LED Tri-Proof Light,Industrial LED Tri-Proof Light,Ip65 LED Tri-Proof Light
Shenzhen Ri Yue Guang Hua Technology Co., Ltd. , https://www.ledlightinside.com